Sunday, December 11, 2016

The Mustang is benefitting from a delay in my studies

I should be doing 10 hours a week studying for my Open University degree but they have yet to release the next two units for the current study block so I am cruising along with nothing to work on. The Mustang is benefitting from that as I have now spent most of today working on it. Being a Revell kit, it doesn't have the part count of a Fujimi one so it isn't taking that long.

I have also decided to stay with the chrome plated parts to save the effort of stripping the chrome and then repainting - first with a black primer and then with Alclad. It always used to be necessary because the manufacturers always put the chrome plating onto black sprues so any cut points always showed and it was almost impossible to hide them. Nowadays, the chrome is plated onto white sprues leaving the tiny cut marks almost imperceptible.

So the first step was to build the engine. I am painting the car in Tamiya metallic blue so I used that on the engine block.


I painted the cylinder heads with Tamiya semi-gloss black and then wiped it off, leaving the paint in the grooves. I think that worked quite well. The chassis is the easy bit, given the fun that I have had with Tamiya and Fujimi suspensions. No such effort here. It is all moulded in one!


The next stage is to make the dashboard. This is where I made my big(ish) mistake. I put the decals into the dash upside down. Mind you, once the dash is in place and the body on, no one will ver be able to see the results.


Once I had fitted the steering wheel, the problem was almost out of sight.


I am now working on the body shell and the main interior.I hope to get a lot done this evening and finish the whole thing off tomorrow - three days? I must be concentrating at last.


Saturday, December 10, 2016

More Lotus 49 and some great service

I am working my way through the suspension of the car. I have managed to get the front suspension done OK. Note: I have yet to spray the etched radiator so you can see the super glue remnants through the grille.


It all seems to work, including the steering but it is very tight so it won't take too much messing about.  I have also completed the cockpit - remember, no seat belts in those days!


Following all of this, I started back on the engine, which meant attaching the rear suspension. This is where it all started to go wrong. A few days ago, I had put together both sides; realised that I had got some of it wrong so took it apart; put it back and found that one of the suspension arms was stuck when it should rotate. I got this moving. When I came back to it, I had to attach a link to that arm and found that it wouldn't come out of its mount sufficiently far for me to carry out the step. In trying to coax it out, it broke off. I decided that I would worry about this later and got on with the rest of the work only, when pressing down on the bottom wishbone, I heard a small crack and another part had broken off. Here are two images of the damage. (I will explain where the good ones came from next).


Pretty dramatic, don't you think! Well, I thought so too but then a memory came from my SBX days. 

On Tuesday, I called up the Hobby Company, in Milton Keynes - they are the Tamiya importers. Giving them the kit code, I asked if they still can supply replacement sprues. "Yes", came the answer, "we can". I wanted the chrome sprue "D" so off he went. Whilst he was looking, I checked on their web site and there was no mention of the Lotus 49 kit so I presumed that it had been retired (again). He came back to tell me the bad news that they didn't have that sprue. I noticed that they did, however, still have the Gold Leaf TL 49B that had been re-released recently. Of course, as I discussed with the Hobby Company guy, that had the same engine and suspension. He, being of a similar era (but a lot younger than me, I guess as he was still out at work - smile), agreed with me. We sorted out that kit number and back he came with the good news. For the princely sum of #11.50 plus postage, I could have it shortly. 

In fact, it came on Thursday. In the meantime, I took the sprue from the 49B kit and got on. Now, I think that that service was as good as you are going to get from a kit importer and they should get five gold stars, if there were such things. So, back to the two images above - that is where the good versions came from. I am now a happy bunny once again and getting on with the build. Well, not quite. I don't find it gripping putting these suspensions together so, yet again, I am putting the kit down for a week or so. I have dragged another kit from the shelf. This time - sorry Dan - I am making a Shelby Mustang 350 for myself!


This is going to be painted in Tamiya metallic blue - a colour that would have been impossible a few months ago as there was nowhere in town where I could buy Tamiya paints but now there is Hobbycraft! Yippee!


Monday, December 05, 2016

Alfa Romeo Finished and onwards with the Lotus 49

I had some fun spraying the Alfa with the Jaegermeister orange. These Zero paints are brilliant, so long as you don't have to touch up anything as they will not brush paint. I had to paint around all the window surrounds in black - to simulate the rubber - and a few bits ran over the orange. Luckily, I had a bottle of Vallejo flat orange which is nearly the same shade, so I used that. I have asked Zero/Hiroboy for some advice but nothing has come back yet.

Anyway, the rest of the car went together beautifully. I did have one little bit where I kicked myself for my disbelief in Tamiya parts fitting. When putting the roll cage together there was on strut the went from the top back to the chassis. This has a pin on it but there was no attendant hole in the chassis. I thought for a few seconds and then cut the pin off. In the past I have told my wife "if something doesn't fit on a Tamiya kit it is because I have done something wrong!" On scanning the instructions just making sure that I had fitted everything, I came across one more strut for the roll cage. This fits in low down into the same slot as the part mentioned above. Guess what. It had one flat side and ---- a hole for a pin to go into!

One last surprise was the little radio aerial on the roof. Rather then moulding one, they tell you to use stretch sprue. Now, if you haven't come across this idea before, this is what you need.


You light the candle with the cigarette lighter. Then you cut off a piece of the unwanted sprue and hold it, gently, over the flame. When it begins to soften - and don't let it get too soft - pull easily apart and you end up with some really thin plastic rod. Once I had done this, I had to cut it to 10mm, glue it in place and paint it black. Why didn't they mould one?

With that sorted, I got on with the decals. There are plenty of them and, unlike the BMW recently, they went on like a dream. One final coat of 2 Pack Gloss and it was ready for showtime.


One thing is wrong - isn't there always one thing? I didn't put the aluminium protection above the exhaust pipes. They supply a small square of self adhesive aluminium sheet which you cut to size and the cut the slot for the towing ring. It looked like something I would screw up so it was safer to leave them off. If the bonnet (hood) looks a bit out of place, that is because I haven't glued it to the rest of the body as, this way, I can take the body off to show the interior. I am very pleased with this.

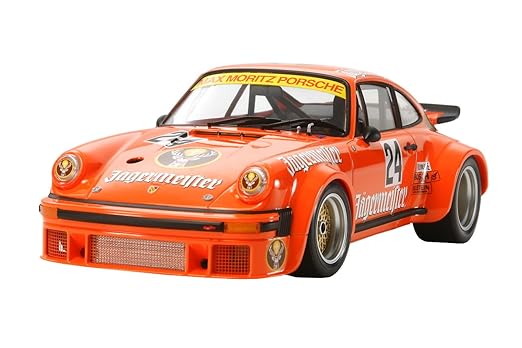
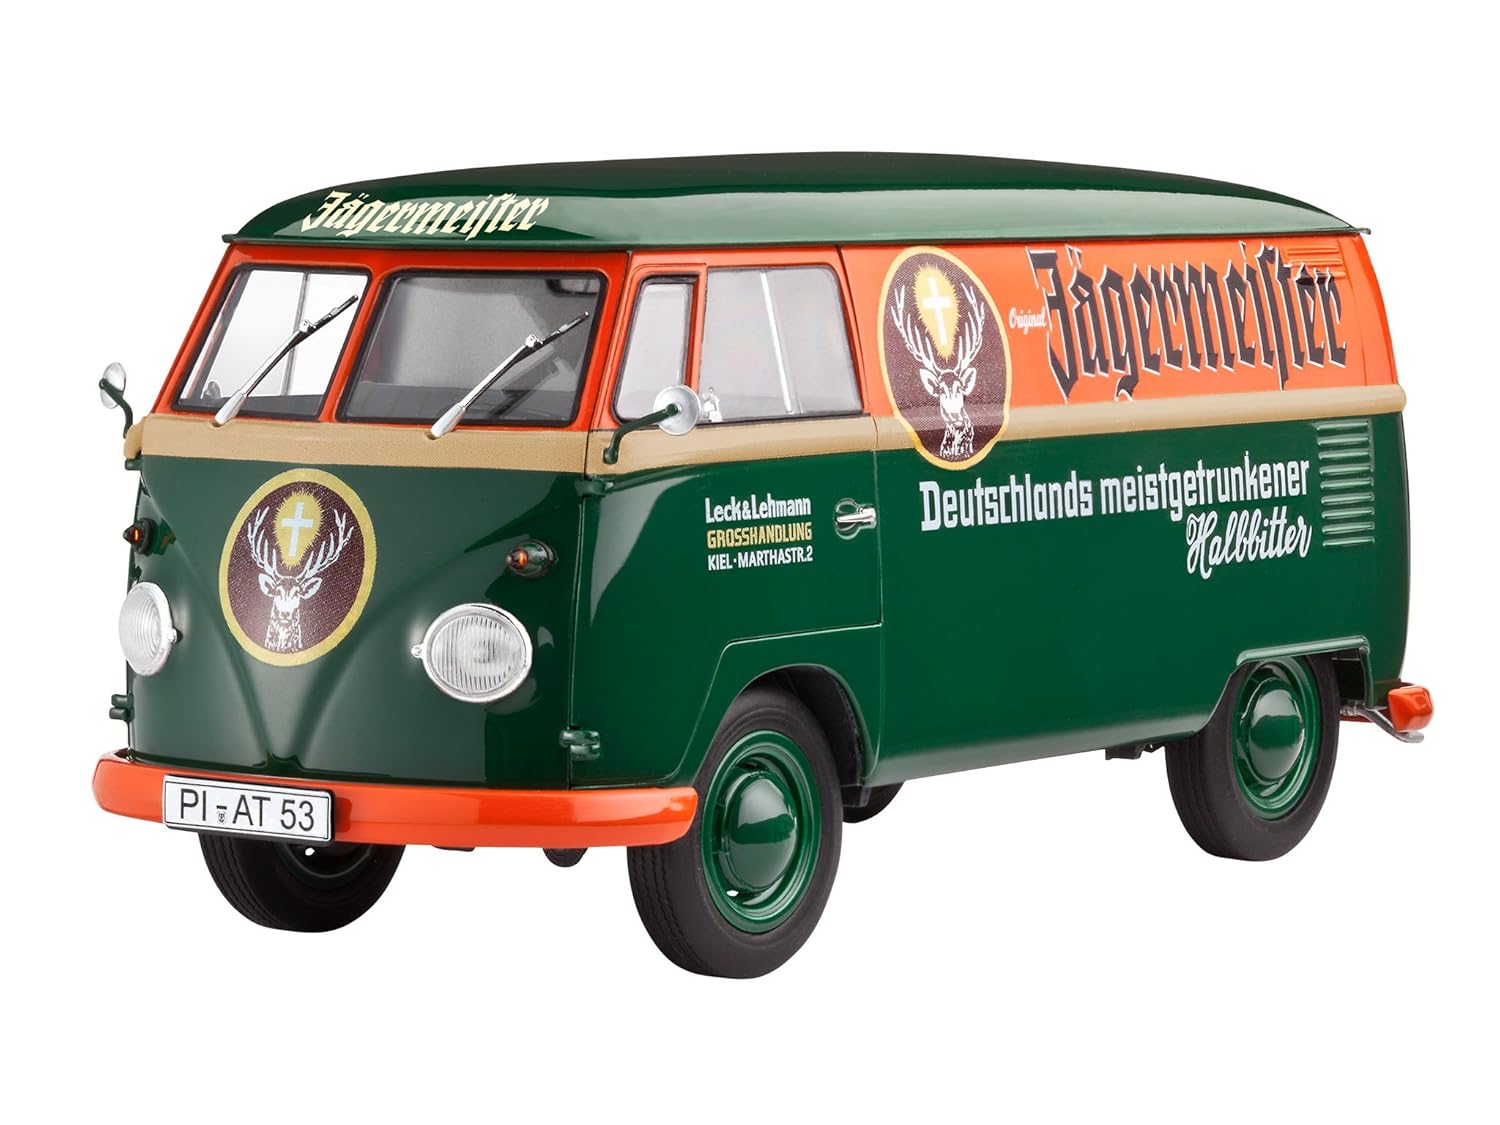
I have a BWM 635CSi (like the one I finished recently) in Jaegermeister colours. I am hoping to get a Tamiya Porsche 934 in the same colours for Christmas. It seems that Revell make a VW van in Jaegermeister colours as well, so I will try and add that.


So, now I am back on the 1:12thLotus 49. I have put the fiddly front suspension together and painted - and decalled - the dashboard. 


The kit comes with etched instruments but they are all solid nickel silver colour and didn't look right so I went with the decals. I think that they look just the part. Now, I have the rear suspension to fit together. Not a lot left to do, actually. I am quite surprised at that.


Thursday, November 24, 2016

Tamiya Alfa Jaegermeister - don't you just hate it when...

I decided, after I had got this far with the Lotus:


that I would have a bit of a break and do something that might result in a finished article for next Thursday's Christmas meeting (1st December 2016) of the Clacton club. I bought this kit recently from Hiroboy. I have a BMW 635CSi to do in Jaegermeister colours but I have just made one 635 so I thought that the Alfa would be different.


Well, it is! I have built the kit with some care and, so far, I haven't broken or mislaid anything. That must be some kind of record for me. I am well prepared because I have the correct orange as a Zero Paint in stock - I bought it for the above mentioned 635CSi. That isn't what makes it different, though. I have laboured long and hard on this. First off, I gave every sprue a coat of Zero Paints grey primer. This is 2 pack stuff so it comes with a primer, hardener and thinner, all of which needs to be mixed in the right proportions for the airbrush. Well - it was either too runny, in which case I put some more primer in - and then it was a bit thick. So thick, in fact, that I had to run it through the airbrush with the needle pulled out of the way. With the needle in place, it just wouldn't come out.

That done, all of the aluminium and the chrome parts got a shot of Alclad. I have bee playing with the Vallejo Metal Colour but I find that this doesn't spray as well as I like. I do use it to touch up though as Alclad cannot be brush painted. The upside of Alclad is that it dries almost instantly but the down side is the smell! What with the stench of the 2 pack and then the Alclad, my wife was a little annoyed at the overall smell in the apartment. I don't have an extractor and, initially, I forgot to open my window.The window is partially blocked by the model railway so it is a pain to open and close - but under the slight (ha!) pressure from SWMBO, it was opened - as was the bedroom window and we got a through draft going.

Anyway, to the nitty-gritty. With everything set up, I started and found, to my joy, that this was a true Tamiya kit. The instructions were clear, there was no flash and everything went together as it should. I worked my way through the engine carefully and made it without mishaps. I was quite pleased with it. Then the suspension went in along with all the underside parts and then I found that the underside of the engine/suspension was covered by a plate so nothing was to be seen. I turned the car over to finish the engine bay to find that a cover went over the whole top of the engine, so no point in spending the time painting up the cylinder heads, for instance. At that point, I checked the body and, guess what, there was no opening bonnet(hood) so, having done all of this work, almost all of it was never to be seen again! Now I wish that I had started taking photos a little earlier.

This is where I have got up to. I am just about to start the inside of the car so I thought that it was a good time to stop and take stock.


Wednesday, November 09, 2016

Lotus 49 Engine

I have been working hard on the engine. There are 8 fuel pipes and eight distributor leads that have to be connected up at both ends. I find that I need to put the end of the vinyl tubing into some hot water to soften it just a tad before offering it up to the pin. Even so, I have used a drop of Zap-a-Gap CA glue to make sure that that stay in place.

Everything was going great until I came back the next day to find that one of the tips of the fuel injectors had broken so there was nowhere to attach the fuel pipe. I was at a loss what to do when I thought I could, maybe, scratch build a replacement. Out came the candle and lighter. I managed to stretch some sprue until it was the right thickness for the lower part. I then drilled a small hole through and inserted some fine brass wire. Lastly, I had to drill a new attachment hole in the engine casing. Once fitted with the pipe in place, unless you look closely, it looks pretty much the ticket!

and a close up of the replacement part.


As you can see, I have also fitted a set of "Air Funnel Mesh" which I obtained from Hobby Link Japan as Hiroboy was out of stock. I tried to fit these using super glue but they didn't stick. I took them off and replaced the glue with Gator's Grip Light. I then found that one of the items had stuck to the cutting board It is a little damaged but I don't have any more:-( so it will have to do. I think that the engine looks better for that.

Here is the final engine ready for inspection.


I think that it looks the business. 

Sunday, November 06, 2016

Lotus 49 - beginnings

The engine is coming together and the bodywork has had another coat of British Racing Green plus a coat of 2 Pack clear (now that my new supply has arrived).

All I have for you is a few images to bring you up to date. Firstly, the bodywork:


Here are two shots of the engine. I am currently putting the distributor together - lots of small tubes!


Note: The distributor isn't fixed. It is just there to include it in the image


Friday, November 04, 2016

Next Project - Lotus 49 - 1967

My biggest love of the 1960s was Jim Clark. This was a man who could do no wrong to me (except race in a Formula 2 race at Hockenhiem, which he didn't need to do and where he got killed!). My best man, Roger, and I used to go to Crystal Palace for every race meeting (I have posted this before) and one memorable day saw Jimmy and Graham Hill compete in the saloon car race. They were both in Lotus Cortinas. Unfortunately, I can't find a decent, workable, kit for one of these - in spite of Zero Pants just releasing a paint set.

Anyway, in my tiny stash, I have the recent re-release by Tamiya of their 1/12th scale Lotus 47 as Jimmy used to race it. Ignoring all the dramas and mistakes of recent builds, I have got the kit out and started to make it. I have a set of wire covers for the air intakes, as these are never included in Tamiya kits. I bought these some months ago from Hobby Link Japan.


Here is the box art. As you can see, when compared to the Mac keyboard, this is a large kit. Placed on top are the body parts (??) that need to be in British Racing Green (BRG). I have primed them with Zero Paints 2 Pack grey primer ready for their first coat of colour.

I have moved on from there and have done the following:
  • Stripped all the chrome off the relevant sprues back to the base plastic
  • Sprayed all the remaining sprues with Vallejo Black surface primer
  • Sprayed all of the engine parts in Vallejo acrylic Metal Colour Steel
  • Sprayed all of the stripped chrome parts in Vallejo acrylic Metal Colour Chrome
  • The body parts have been given one decent coat of BRG and then cut back with MicroMesh before  getting a final coat.
  • Everything else has had just a coat of the Black Primer

I ran out of 2 Pack Clear finish (actually, it ran out onto my cutting board and stuck everything solid) so I had to order some more. Hiroboy got me the pack very quickly, as usual, so my next task is to 2 Pack the BRG bits.

At that point I will post some more images.

More news on the racing Mini-Cooper. I found a Youtube video which showed how to remove paint using Dettol (For US readers - Dettol is a strong disinfectant). I tried this and it worked - sort of. It did manage to clear all of the combination of Vallejo acrylic primer, Zero paint BRG, Johnson's Klear and Vallejo Flat Green. It was a messy process and my wife constantly complained that the flat smelled like a hospital! Also, it detached all of the parts stuck on with Tamiya Extra Thin Cement. That was alright until I realised that one headlamp had gone down the plughole! Annoyingly, my Hiroboy delivery had included some racing car number decals to redo the Mini once it was repainted.  As I can't have a Mini-cooper with only one headlamp, I threw the body away and will buy a second kit - I have done this a few times before if you remember - a Ford Mustang and a Ferrari 330 P4 spring to mind. So, there we are. A nice set of numbers and a chassis but no body. This project could run and run. 

Monday, October 31, 2016

Tyrell P-34 Final Shot

I made a small base, to represent the start line, for the car out of 5mm foam board. I think that it sets the whole thing off nicely.


You can click on the image to see a bigger version

Sunday, October 30, 2016

Tyrell P-34 finally finished

In August 2015, I posted a blog entry about the Fujimi Tyrell P-34 that I was building. You can follow the story HERE. I was not very keen on painting the body so I put the model away until I felt better about it. Well, that time has come.

I got it out of the box and tidied up the chassis. Then came the body. Well, I knew that I shouldn't have started. It went like this

  • Decided that the body covered all of the great stuff I had done so I would show the car with the body removed
  • Sprayed the body and the nose with AK Interactive Polymer Acrylic White Primer - great stuff.
  • Masked off the top of the body as this was to be white anyway
  • Sprayed the rest and the nose with Zero Paints Tyrell Blue
  • Took the primer off - usual mess of a line
  • Tried to clean it up - made it worse
  • Masked off the white (mostly) to respray the blue
  • Over sprayed the blue onto the white
  • Masked the blue and sprayed the white
  • Over sprayed the white onto the blue
  • Gave up and got out an Andrea blue (from their Shades of Blue set) and hand painted the body.
  • One coat of Johnson's Klear prior to decalling
  • Applied the decals
  • Microsol interacted with Klear and had some white patches
  • Retouched blue
  • 5 coats of Klear sprayed - useless
  • Tried Xtracrylix Gloss - useless
  • Three coats of Vallejo Air Gloss Varnish - job done
I then spent some time going through finding all the little bits that I had missed off, including some tiny decals.

Well, it is now finished. I am not happy with the body but I am very happy with the chassis. 

Warning: When fitting the dash, I broke off the steering wheel. I re-attached it but in some of the photos it has slipped a little. It is fixed in the last image!


I can't say that I enjoyed this build. The chassis is very complex with lots of small parts that broke very easily and the body was a right bother to paint. One sidepod wouldn't go in properly and the nose and bodywork are supposed to fit on pegs on the chassis so I had to fill them, which didn't go very well, either!

I used to have the 1/12 Tamiya kit but it got damaged in the garage of my old house so I had to throw it away. I would like to have another go at that if I can find one (and afford it).


Wednesday, October 26, 2016

What a mess! A sad episode with a Tamiya Mini-Cooper but success with a Tyrell P34

Rather than get a new kit out after making the BMW CSi, I thought that I might resurrect a model that I was working on last year and put away. This is my Tamiya racing Mini-Cooper, which I am doing in Cooper Car Company colours as I saw them racing at Crystal Palace.

I put this away because it was one of the first times that I had used Zero paints (British Racing Green - BRG) and I made a complete mess so that it ended up with a very bubbly finish. I got it out and had a severe go at sanding down the paint and then polishing the plastic before priming the body again and giving it a new coat of BRG. That went on well so I got back to work on the chassis. After some serious conversations on BritModeller about seat belts, I realised that the kit racing seat was from a later era. I managed to get it off and replace it with a standard seat. I then had an investigation into seat belts and finally decided that a set of grey belt that were anchored to the rear cross member would be the best and accurate option. I happen to have bought some seat belt material from Hiroboy so I was able to make a good representation. Then, disaster struck - but let's have some photos first.


I was not sure about the stripe along the side and the BMC badge but the instructions showed them so on they went. The problem came with the other side of the car. The number 1 of the racing number folded over and then the whole decal broke up. I managed to get the 2 back together but the 1 was shot. I thought that I could resurrect this by masking the number to the right dimensions and spraying it white. Wrong! I had been a bit clever first, because I gave the side of the car a coat of Johnson's Kleer to protect the decals that were already there. Wrong! The masking went ok but I got some bleed under the mask - and the masking tape pulled some of the side stripe off.

I went looking for sources as this stripe was bothering me. It turns out that these weren't on the car that I was trying to model so I had wasted my time messing around with them. I tried sanding the decals off gently but that failed so I now have to strip the body again and get hold of some racing numbers to re-decal the car. I might get away with leaving the bonnet but if I can't then I will have to get hold of some white decal sheet to replace the stripes. Anyway, this is what that side looks like.


Guess what. It is back in its box again! I will finish it.

I grabbed another box that has a partially complete model in it. This time it is a Fujimi Tyrell P34 6-wheeled Formula One car. I have the chassis of this complete but the body needs building. Having looked at how great the chassis looks, I don't think that I will fit the body as then all of the complex suspension, etc. will be out of view so I will mount the chassis and the body side by side.


I have given the body its first coat of primer.


More to come.