Thursday, November 30, 2017

Chevvie C7.R finished

I did get my brain right. I had a look at the other kits and decided to have a go at the Fujimi Ferrari 512S. What I didn't realise was that this was a very old kit. After starting work on it, I got to the point where I had to mount the engine and realised that I was never going to get it to work.

The model might follow the prototype perfectly but getting everything together and strong enough to hold the rear wheels in place was a task beyond me. This is as far as I got.


As you can see, the engine is supposed to hang off all of those thin structural arms. Well, I could see that being a bit of a stretch for me so I put the box where I could remember to take it down to the bin room. However, now that I have opened it up again, I think that I will just replace it on the shelf and have a second go some other time.

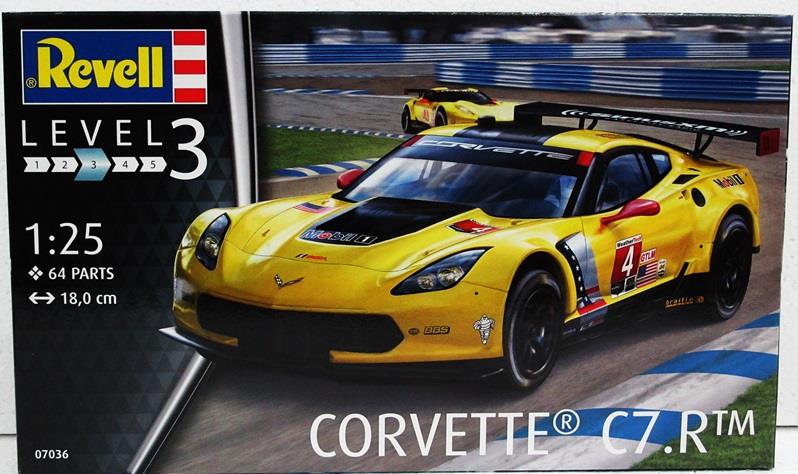
Ashamed of myself, I dragged the Corvette C7.R out one more time and had a third go at getting the black and yellow masked off. This time it worked to an halfway decent level. I decided that I would regard this as a "four feet" model. This is an expression that Aaron Spilling (an old SBX customer and creator of Paint4Models web site) used which meant "only look at this model from four feet away". Well, the Corvette isn't quite that bad but it isn't a good idea to get too close!

Any way, I finished the painting and started on the decals. There are nearly 100 of these and some are really tiny. I lost some of the little red arrows that indicate the door and panel opening catches. I scanned in one I had left, put it into Illustrator and placed it on a background of yellow as near as I could get to the car colour. Then I made a few copies and printed them out onto a sheet of white decal paper. After a coat of varnish,I placed them on the car. The idea of the yellow background was as follows. If you print yellow or red onto clear decal paper, the colour is very muted as the printer expects to get white paper behind it. However, if you print just the arrow onto white decal paper, you then have to trim the image. As the arrow is only 2mm long, this wouldn't work. By putting a yellow background, I could cut out the arrow and leave some of the background. Not ideal but better than no arrow, or at least that is what I thought. This is the result.


It looks terrible when seen at that magnification but it looks OK on the model from that four foot distance! 


In this picture you can see some of the other arrows. Although the background does show, the arrow is still there which is better than not.


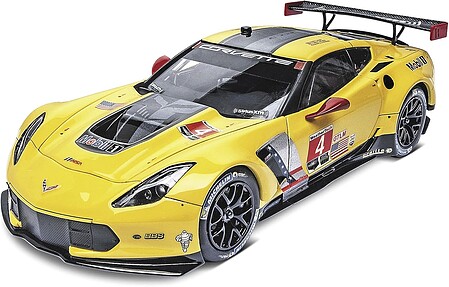
Anyway, here is the finished article. 


It is a very dramatic model and I am pleased that I finished it.


Wednesday, November 22, 2017

Stuttering halt again

I would like to blame it on medication and pain but I am just not getting it with the models I am currently making. Both the Chevvie and the Seastar suffer from the same problem. I can't mask off an area without the paint bleeding underneath.

As a consequence, I have put both kits back into their boxes in the hope - along with the BMW M3, that I will get my brain right and come back to them.

So, I have three choices - well, four actually if I include dropping making models for now and going back to my model railway. Mind you, I have a mental block there as well at the moment!

My three choices are:
  1. Make the recently purchased 1:144th Beaufighter - easy choice as it is all over foliage green, being an RAAF aircraft. This means "No Masking"!


  2. Make the Airfix 1:72 Hurricane Mk. I. This would be an easy build except that there are 51 pieces so maybe not. It does have upper surface camouflage but I managed this on the Spitfire so hopefully...


  3. Make the recently acquired Tamiya 1:24th Mercedes AMG GT3 which, again, would be a good choice as it has a single body colour so no masking as well. Also, it is a Tamiya kit so there shouldn't be any gotchas.

Then again, I have a pile of other racing sports cars to make so why not one of them?

Not sure.
Wait and see.

Sunday, November 12, 2017

Easily distracted - Lockheed Seastar

As mentioned in the last entry, my next aircraft was to be the Airfix Hurricane. I only have one other aircraft in the "stash" and that is a very short run Sword Lockheed Seastar. I bought this when I was on a roll with US Navy trainers - having made a T-2 Buckeye and a T-45.


However, before buying the Hurricane, I had a look at the Sword kit and thought - no location pins, bits of resin, lots of photo-etch(PE). I can leave this one until later.

I must have had a brainstorm! I have had to give another couple of coats of yellow to the Corvette and then sand some bumpy bits down so I couldn't carry on with that. (So much for me finishing it today and getting on with the railroad tomorrow). As I was in kit building mode, I thought about the Hurricane but then said "Why not. The Seastar can't be any more difficult than resin Fairey Gannet, which I finished successfully some years ago". So, out came the Sword kit and off I went.


A nice looking plane and in white and international orange. 

First things first and the cockpits have to be built. There is quite a bit of PE in the cockpit. Fortunately, I have an Etch-mate PE folding tool and some good Zap-A-Gap CA glue. So, in my new slow and careful modelling mood, I worked slowly through.  Then the carpet monster came into play. I made up the two control panels. Both are a sandwich of a plastic back, a PE black layer for the dial faces and a PE outer layer for the panel surrounds. I got as far as gluing on the black layer for both panels and was waiting for the CA to go off. After painting the tub of the cockpit and the resin bang seats, I couldn't find one of the panels. I even asked SWMBO to have a look for me but no luck.


I used the black panel layer as a pattern and cut a new styrene backing, and, one would have thought, I painted the face black to imitate the missing PE. No, I forgot that stage so having glued the panel on, I had to paint in the tiny dials with black paint. I went for dinner. Came back an hour later and, in making the front undercarriage bay, dropped a part and went looking for it. Not only did I find the dropped part but also the panel from previous. The carpet monster was having fun with me by hiding it earlier but letting me have it back, eventually. I had to cut the front PE of the new styrene backing and put it all back together.

This is where I am at the moment. 

(you can click on any image for a slide show)

After that little episode, I began to look at moving on. The cockpits fit into the fuselage but, true to a short run kit, there is just a little bump to align everything. Added to this is that the front cockpit is glued to the front undercarriage bay which means, I am sure you can tell, lots of opportunities to fit it in the wrong place! 

As it was nearly eight pm, I decided to write up the blog and leave the kit until I am fresh tomorrow morning.

Saturday, November 11, 2017

Spitfire Mk VI finished and the Corvette on the way

I had a burst of enthusiasm yesterday and finally got the Italeri Spitfire Mk. VI finished. It is straight out of the box, except for one mishap, as usual. I put the decals on the underwings, painted the yellow  leading edges and then added the red patches over the gun ports (which were supplied as decals. In trying to get them to conform, I dosed them with Microsol. Unfortunately,  I touched one of the patches before it was dry and it came off on my finger. The only solution was to paint all four as mired paint wouldn't match the decals. I masked off the yellow stripes and did some of the painting. When removing the masking, the RAF roundel on one underwing came apart with the tape.

Fortunately, Hannants sell a decal sheet of the exact ones I needed. It was £3.05 with free delivery and came within 2 days. Well done Hannants. So, I repainted the underwing decal areas and replaced the decals. All that was left to do was to fix the undercarriage and propellor.

As usual, I had a small (ha!) problem with the propellor. It has a four bladed prop but the only boss that I could find the sprues was a three bladed one. Where the correct part had gone is a mystery. I sanded off the routing slots for the three bales and managed to fit four around it. You wouldn't know.

Last two jobs were to give the model a coat of flat varnish and add the canopy. I decided to have the canopy closed.


(click on any image for a slide show)

Now that this is finished, I intend to complete the Revell Corvette C7.R. Then, it is back to the railroad for a couple of weeks. I have already purchased the next aircraft kit - an Airfix Mk. I Hawker Hurricane from the Battle of Britain. 


I need to get the Corvette finished. It is quite an easy kit building I have all of the chassis completed.


I have also sprayed the bodywork with the Zero Paints Corvette yellow.  Even though the plastic was yellow, I did give everything a coat of white primer as I find that yellow needs a white background. 


(I have just noticed, from the photo, that I have missed painting the rear view mirrors yellow!)

I should get this finished tomorrow, and apply the decals (lots of them) over the next few days.


Wednesday, November 08, 2017

Next Up - Revell CorvetteC7.R

I fancied this when I first saw the Hiroboy had the correct yellow. That always gets my interest.Although, I must say that I don't go much for Japanese cars at all.

OK,so there are two variants of this. Firstly, there is the Revell-Monogram version:


and then there is the Revell Germany version (which I have):


The only differences that I can see are:

  • The German body is moulded in yellow plastic whilst the US version is moulded in white
  • The US instructions are the usual Revell type whilst the German version is is full colour.
  • the box art on the US version says Level 4 whilst the German version says Level3.
The instructions are really good. See the front and back cover:


I have started on the kit. First off, so much of the interior is a basic black (maybe satin or gloss but black nonetheless) so I shot as much as I could with my trusty Vallejo polyurethane black primer.  I then sprayed the engine parts with gun metal. The parts fit very well so far. 

Here is where I am:


There is a distinct lack of suspension parts and the wheels are fixed on using two solid axles across the chassis. However, once the interior pod is fitted, none of this shows. I think that this is going to be a fun build as there aren't all the little bits of body work that need individual painting as there was on theLaFerrari. The yellow will really stand out as well.


LaFerrari sort of finished

The Tamiya LaFerrari is a fantastic kit and worth every penny of £50.00. However, there are many possibilities of making errors and I hit every one of them. None of the errors are Tamiya's fault as the kit goes together brilliantly. The problems come from completing a very smart model and giving it the pristine finish that it deserves.

The problem, for me, always revolves around using a special paint for the finish as I find that there is always some touching up to do. I use Zero Paints for my car colours as they produce the exact shades required. This means that this Ferrari is painted in Zero Paints "Rosso Corsa 322". Where the real problem comes from is that you cannot brush paint with these paints so any touch up is nigh on impossible given the way that I seem to work (sad smile). The other problem comes from the use of Zero Paints 2K Clear coat which is a two-pack varnish. This requires mixing the varnish, thinners and hardener in the correct proportions. First off, I always make too much and there are dire threats about disposing down the drain so I always have to be creative with the residue. Secondly, it is a faff to make so if you do have to touch up, there is a problem getting a consistent finish. As an example, I ended up having to respray the bonnet (hood) of the car as I, inadvertently, wiped a brush across the surface (the brush was loaded with cleaners so just laid down a slight black smudge). It was OK respraying the red but I shied away from making up some more clear coat. I brush painted several coats of Johnson's Klear and that seemed to do the job. I have used Klear before when glossing up car bodies. It can be brush painted as it is self levelling so never leaves brush marks. Secondly, the layers blend together so the final result of two or three applications is normally fine.

OK, so how is it left. Well, here is the "finished" model. I haven't stuck all of the panels down as there is so much underneath that I want to be able to see all of the work so the photos make it look as though the panels are mis-fitted. I made up a base using two layers of 5mm foam core and used Adobe Illustrator to make a cover.

One little story. there is a metal decal provided for the prancing horse on the rear panel of the car. When trying to apply this, it pinged off into the wild blue yonder, never to be seen again - or so I thought. When cutting out the foam core for the base, I turned one of the layers over to find that the little metal decal was attached to the underside. Where it came from and how it got there, I have no idea. It is now firmly fixed on the car. Mind you, although it was glued to the foam core, it wouldn't fix to the car so I had to apply a little Titebond glue.

Click on any image for a slide show.