Tuesday, October 30, 2012

Working hard on clearing the decks - Mustang under the cosh!

Having finished the AEW3 Gannet I am now trying to clear my workbench of the 1/12th Ford Mustang. It is a great looking kit but has been very disappointing given that making it is the same experience as making the 1/24th scale one, which I did last year. One always hopes that 1/12th brings greater detail but, as described in an earlier blog, that is not the case here.

Never mind, that is all water under the bridge and in fact it is coming together and looking very nice. I have yet to start on the interior or the body work but what we have here is a "rolling" chassis. Don't forget that you can click on any of these to see a much larger version.

Firstly, the complete chassis on its wheels

This is the underside view
This is a close up of the underneath of the engine compartment - as you can see, no working suspension or steering in this kit!
Rear Suspension
A close up of the nearside (whoops sorry, wrong side of the Atlantic) offside front wheel
Lastly, on overview of the engine department. There is one breather still to be added to the engine but that comes later.
BTW, it may look as though it has working springs but that is an illusion. They are actually painted black in the inner grooves so that they look like real springs!

After I have taken this to Clacton on Thursday, I will start work on the interior.

Sunday, October 21, 2012

Brief Grandson Interlude

Had my grandson Harry over to stay for the weekend. He always enjoys making models with me - or so he says - maybe he is just being nice. No, seriously, he does enjoy the process and always takes it very seriously.

This time I picked up an Airfix 1/76th battleground scene from the local Modelzone (where has that great SBX Models gone then?). This comes with two tanks - a Tiger I and a Sherman plus a ruined building, lots of figures and bits plus a nice moulded base.

Harry made the Sherman.


and the ruined building.
I made the Tiger
and painted the battleground base
He has taken the rest home to do with his Dad over the coming weeks. I hope to get a photo of the finished item.

What a great way to spend a weekend.


Thursday, October 11, 2012

This folding wing idea is going to work!

I have played around with the wire, bent it a bit this way, and then back again and I think that it is actually going to work. here are some photos of where I am at the moment. Nothing is stuck and nothing is trimmed. However, the supporting rod that goes from the wing stub, past the first fold, with a peg into it to support it and then on up to the wing tip, actually can be put in place without bending. I have to get the other wing set up and then I will glue and trim. After that, it is a case of filling and patching the paint - that's not going to be easy so I might have to live with the final finish - oh well, nothing I do is perfect so there we go!


This last picture shows that I still have to get the alignment right on the upper join but this is very close to a 'done deal' as we used to say in the City.

I think that the application of some matt black paint to the bits of brass rod that show will actually disguise them enough so that they will only be seen if I point them out. Mind you, as I normally point out my faults then it is likely that they will not go un-noticed. I am sure my speed in owning up has cost me many a point on the club table in the past

Wednesday, October 10, 2012

One Gannet down, one to go!

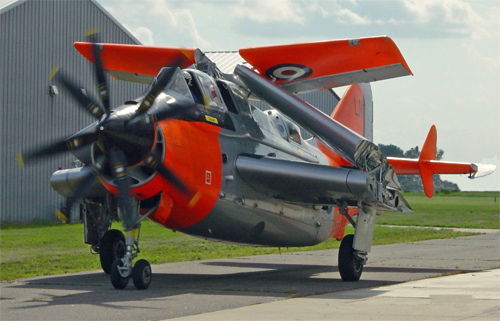
I have decided that I must finally finish the other resin Gannet. Now this is an interesting one. The reason that I have a resin version is that I need to build a COD Mk4 (COD = Carrier Onboard Delivery) and the plastic kits only do standard versions - the COD didn't have a dustbin radar and a few other changes.

Now we come to my 'friend' Ken - who was kind enough to get me the kit free and gratis courtesy of his links with CMR. However, he did me a real disservice by also getting me the wing fold! Now a plastic kit with a wing fold tends to give you some support buts that will hold the wing in - roughly - the right angle so you can stick it together. No such luck with this resin kit. You get a complete new set of wings with all the fold details beautifully provided - but no means of getting everything held in place securely or at the right angle. This has held me up for nearly a year but I have now, in a flush of enthusiasm, decided that if I can finish the AEW3 then I can finish the COD as well.

Plan A (there is no plan B - heard that before?). Drill some holes through both parts of the wing - insert some brass rod and super glue it. These will then act as hinges so that I can bend the brass rod to get the right angle and the rods will give everything some structural integrity.

This is where I am so far - and so far so good!

This is where the model stands at the moment
 This is the type of fitting you get in the kit - nicely to scale
but not much good for holding anything in place
 So now we have some brass rods in place
 Here are the holes in the bottom wing that will receive them

I have also drilled up the end of the wing which sits on top of all this and fitted rods into that as well.

I now need to glue it all together and then bend until the angles are right. All that will be left to do then is to fit the nice little detail bits and to fill in the holes. Oh, I forgot, I have lost my little supply of the Vallejo paint mix that I used for the basic colour. I do have some Xtracolor enamel that is the correct shade so I am hoping that this will cover up the filler.

Just so you know, this is what the wing fold has to look like at the end:

Monday, October 08, 2012

Hooray - The AEW3 Gannet is finally finished!

Ken Withey picked this kit up for me from the Alley Cat stand when he went to Telford last year so I have had this for 11 months now. It has sat languishing in the cabinet without legs, wheels and props while I contemplated what to do about building up two sets of propellers when what I had was two resin prop bosses and 8 white metal prop blades. I decided last week that I would cheat and use the props for a Trumpeter kit that I have lying here (it's the donor kit for canopies to replace the vac form ones in the COD Gannet that I still haven't finished - but that is another story. The more I thought about it, using plastic props would have been a cheat because I was either going to crack this resin thing or not - no half measures.

So, Saturday afternoon I sat down and had a go at the kit set up. Amazingly, it was quite easy. I am getting a bit more used to super glue now. However, I did fill in the gaps around the end of each prop blade when these should be clear - but I was pleased just to get everything in the right place. The resin canopies seem like a good idea. I framed them with painted Tamiya masking tape and then gave them a dunk in Klear to make sure that the tape stays on.

Anyway, this time I won't give you a list of all that is wrong. I know how many things there are and if you can spot them then kindly be quiet. I have made - AND FINISHED - a resin aircraft and I think that is a pretty good achievement. Anyway, here are the photos. Don't forget that you can double click and get bigger views - but that might not be a good idea - grin.

This one is for John Sillett - although this isn't the one he ditched in Singapore, it is one that he is listed as flying so that is something.


One last comment - it is stuck to the base - which is painted the colour of a Carrier deck - because it is a tail sitter. However, with a resin body, there is no space to put any weight in so there is not much you can do about it.

Wednesday, October 03, 2012

So, I have finished something but...

Well, I have finished the Dauntless but now I have taken some photos, I am not sure that I should have bothered. From a distance it looks fine but up close you can see that the canopies are a 'sort of' fit and when photographed, look dreadful.

Still, I have done the best I could with a really c**p kit - at least that's my story and I am sticking to it.

Things to note about this one:
  • The canopies sort of fit
  • I have lined the canopies out using Tamiya masking tape rather than trying to either mask them up or hand paint them. It looks fine at normal viewing but up close you can see that the tape is a bit thick.
  • One of the undercarriage doors went 'ping' away when I was trying to fit it using some tweezers. Hence, both doors have been replaced with thin plastic card. they actually look better and fit better.
  • I broke the landing hook when cutting it off the sprue so I had to make a new one out of brass wire.
  • The radio aerial is made of my usual stretchy thread.
Well here are the photos - no comments accepted about the quality of the build - grin.


Monday, October 01, 2012

At last I am getting back into the swing of things

The Airfix Dauntless is moving such that it is nearly finished.

What is left to do?

Well I broke the landing hook so I have to make another one from brass wire.
I have to fit the canopies
There has to be an aerial wire from the large aerial post on the front back to the tip of the tailplane.

Then it is all about a bit of varnish and finishing up.

One bad thing. there is a very poor join between the starboard wing and the fuselage and my attempts to smooth it out haven't worked. Hence I have left it but I am not happy - however it is a c**p kit - all poorly moulded bits, lots of flash and rivets that you can cut your finger on.

The whole point was to get back into modelling in the new place with as little effort as possible and this has achieved that.

Next step is to get back to the kits I haven't finished. This means the 1/12th Mustang and the two resin Gannets - gulp!

Here are some pictures of the Dauntless as it stands at the moment.