Sunday, December 12, 2021

Fujimi Ken Miles GT40

 Well the plan was to make a Fujimi GT40. Firstly, I had to acquire a kit. This was an EBay job as it isn't in the current catalogue.


Luckily, I still had some of the paint left over so getting the right colour wouldn't be an issue. So, off I went. The whole process went very well but, somehow, it didn't click. Maybe having made three before took the shine off. I got everything done except for the glass and that's when it started to go wrong.

Firstly, my little PVA dispenser wouldn't work properly - it needs the little tube cleaning and I couldn't find any wire thin enough - so I used MicroScale KrystalKlear. This didn't hold too well so I used little MEK to get it fixed. The came the tragedy. I realised that I hadn't painted the PE grill that goes across the back of the car. I carefully masked out the surrounding area and sprayed it the correct blue. Ahhh. It's a grill! so the paint went through as well as on. Now, all of the windows had a fine coating of paint on the inside. I experimented with cleaning the back window and that just made it worse. 

I decided to throw the whole thing away but then I thought that I had spent a good deal of time on the model and it was a tiny way away from being finished. It needed the front "red" hooks and the fuel filler cap installed plus the two external exhaust stacks. I squeezed the body on, with the windscreen popping out again so I took it off again. Having re-glued all the windows and having left it for a few hours, I tried again. The body went on and the exhausts went on fine. Finally, I had to fit the rear tyres. I then noticed that the nearside (UK style) front wheel had become detached from the brakes. So, of came the body - again!- and the wheel was refitted. The body then went on without issue so now it was finished.

Was it worth finishing? I think so. How does it compare to the Meng version?

Firstly, you can see that the Meng is higher than the Fujimi.  (You can enlarge any image by clicking on it).


Next, you can see that the decoration panels are different colours. Looking on the internet it is really inconclusive because it depends on how the photos have been processed but it look likely that the Meng option is nearer to the right colour. 


The other main difference is in the shape of the back window. The Meng is much squarer than the Fujimi but I can't find and real reference to back either up. The final difference is in the build - the Meng body is designed slightly differently. It has the lower parts to the body fitted to the chassis so that there is a break line between it and the upper part. On the Fujimi it is all a single moulding. This looks better, in that there is a distinct gap on the Meng. However, I was unable to get the body to sit down on the chassis satisfactorily so it looks worse. Plus the engine cover is pivoted on the Meng, which is a nice idea as, supposedly, you can lift to see the engine. However, it doesn't sit down correctly and the breather on the engine catches on the body panel making it difficult to lift it out.

Overall, they both went together well and were both fairly enjoyable builds. I went for the Fujimi because ~I didn't like the way the three body parts fitted on the Meng but having messed up the Fujimi windows, its the Meng that looks better. Oh well!

Anyway, here are the business shots of the Fujimi.


I have a Tamiya Mercedes GT3 in the stash so that might be next as I already have the right Zero paint colours and some interesting decals. However, I have a Ford Mustang coming as an Xmas present which I hope to build as the Bullit car. I am also hoping for a 1968 GT40 and a Tamiya Mustang GT4 as extra presents so it looks like car heaven for a few months.


Friday, October 15, 2021

Subisidiary to Meng GT40

 Excitement all round. I have just finished watching Ford v Ferrari with Matt Damon and Christian Bale. 


Very enjoyable. However, I am a big fan of this 1966 Le Mans and the ending didn't quite get it right! Ken Miles didn't cross the line first and then find out that he came 2nd. Bruce Mclaren edged his car into first right at the line. However, the film got it right in that, even if McLaren hadn't done that, he would still have won because he started further back at the start and the race was judged on distance, not final position! Here is my take on the end of the race.


At the club last week we got to sit down and compare the two models. The consensus was that the Fujimi was the better kit all round. The body fitted, the suspension was much more delicate and detailed and overall it looked just that bit more like a GT40. 

In fact, I am so disappointed with the Meng kit that I have just ordered the Fujimi example.


I still have plenty of the Zero Paints colour left. The kit should be here next Monday.

In the meantime, my 2nd copy of the Hasegawa S-3A Viking has arrived so I am starting that .


I have got the fuselage together and added the nose weight. I didn't paint the cockpit grey as it can only be seen through the canopy so any grey will do!. I did paint the seats though.


I must crack on so that I am ready for the GT40!


Thursday, October 07, 2021

The new Meng Le Mans 1966 GT40

 As you will know, I am a big fan of the GT40 as I was there in 1966 - well waking up every hour or so to check on the positions of the Fords v the Ferraris over that weekend. Also, I have both Bruce McLaren/Chris Amon car and the Dan Gurney one (with the extended roof) - both from Fujimi kits. I was very excited when Meng brought out their 1/12th scale version but was less interested when I found out the price! However, they then released a 1/24th scale version and that I had to have.

I decided that I should do it in Ken Miles' No. 1 which meant going to Hiroboy.com for one of their fabulous Zero Paints. Needless to say, I had to buy some cleaner for it. I then made a bit of a mistake going for their 2-Pack varnish as this, I have found in the past, is tricky to use as it goes off quite quickly and there is always the chance of it solidifying in the airbrush.

When I was at St. Ives for the show, I got talking to a guy from the Mildenhall club who recommended something called Gauzy Agent. One of the traders had some. I must say that it works very well but it seems to be a dead ringer for Future, of which I have a stock anyway. I used it and it came out well so I will stay with that for now.

I don't have a lot to say about the build as it went together very easily. The suspension, at both ends, was a bit fiddly but it got together somehow. The main problem is that I can't get the body to sit down on the chassis properly. I have left it un-stuck as I didn't want to risk ruining the paint job (as you can't brush with Zero Paints) and I can now open it up to show off the engine and the interior. Any way here goes with the slides.

Click on any image to see a larger version.


Wednesday, August 11, 2021

Airfix Bristol Beaufort Mk. I

 I bought this after seeing some good reviews. I also know how good the latest Airfix kits are so I had high hopes. I took the box down to the club and showed them how a 1:72nd scale model could have 106 instruction steps! It all seemed a bit daunting so it stayed on the shelf for some time.

Looking at my "huge" stash of 4 unstated kits and the BR-52 in progress, I didn't have too much choice for my next model. In fact, it was a good model to make. I made some stupid errors, as usual, but all in all it worked out OK.


Most of the complication comes from the complete interior.


As you can see from the picture below, most of it can't be seen once the fuselage is glued together


Thos struts coming from the fuselage are very good when it comes to fitting the wings. Just for once, there was no filler required along the wing roots.


Normally, when doing British WWII camo, I spray the background colour and then hand paint the seconds once but this time I decided to spray both colours so a complex bit of masking took place. This is a combination of normal 10mm Tamkita Kabuki tape and 5mm Tamiya flexible. Just force this work OK and everything looked good afterwards.


Once it was painted, it was time to fit the undercarriage. I always leave this and the aerials off until last as I have a habit of breaking them whilst painting. The undercarriage was quite complex but every part had a notch to go in, all except the curved bit on the front which was a case of stick it where it stays!


Here is the finished plane on the workbench. I will note the issues at the end of the blog.


Here is the finished plane in its full glory.


Problems and issues

Well, there were no real problems except for the difficulty I had putting together the turret and its gun. I just didn't seem to be able to get the guenon the ring and then get the two turret transparencies to go on using my normal Titebond yellow PVA. Then I made the real mistake of changing back to my standard MEK. This was going OK until I got some on my finger and than got some on the glass and so it went downhill. As a result, the turret glass is no longer transparent!

Secondly, I left the chin gun and aerial off until last. I stuck the chin gun on and the realised that I had put it over the hole for the aerial so I removed it, simultaneously putting the aerial down. Guess what? They both disappeared and are no longer to be found. I have searched the desk and the floor but they are gone! So, the model is complete (?) without them. As I never pick a model up once it is finished and in the cabinet, I won't ever see the issue but, actually, do I care? Not much as it was a fun build and looks good on the table. At least I got some nice comments at the club, which is unusual.

Conclusion

Well, that's it and on to the next one. The stash is getting a little sparse and may only real options are the Airfix 1:48th Sabre, the Tamiya 1:48 P-38 Lightning or back to the BR 52, Wait and see.

Sunday, July 04, 2021

Sword Fairey Gannet AEW.3 - not as simple as it looks

 You may remember, a few years ago, me telling you about an ex-Air Scout colleague - John Sillett - who joined the Royal Navy and flew Gannet AEW.3 aircraft during the Rhodesia crisis. I built a model of one of the aircraft that he flew using a CzechMaster resin kit, given to me by an SBX customer, plus some AlleyCat decals.  Check out that blog post. Well, that model finally fell apart and died. I recently found out that Sword had released a plastic version in 1/72nd so I decided to have another go.


Given that I found the resin kit to be somewhat tricky, I was expecting an easy ride but it was anything but. I have a series of images rather than a blow by blow account. I will then fill you in with what went wrong and what went right.


What went right is fairly easy. Not much but I ended up with a reasonable model which, if you stand a bit further back, looks OK. The decals went on well, the basic paint job was good and the masking didn't bleed. 

What went wrong? 
  • I got the line between the dark sea grey and the sky wrong on the nose - I didn't bring it in at a sharp enough angle. I only noticed this as I was putting the decals on so I had to carefully mask off the decals and paint the new line in. 
  • I got the undercarriage bay on one wing in the wrong place. This was easy to do as there were no real markers for where it should go but I didn't realise that part of the setup was the support for the undercarriage leg. As I set the bay too deep into the wing, I had to make a new support for the leg out of plastic card. It worked ok though.
  • I lost the radio aerial so had to put in a new one made of a piece of piano wire.
  • I thought that I had lost the small door on the front undercarriage so I made a new one. After sticking it on and painting it, I found the original!
  • In the instructions, the wheels attach by sliding onto pins on the u/c legs. However, there are no pins, just some small stubs. As a result, the front wheels wouldn't stay on so I had to use super glue on them. Now I find, after coming back from the club, that one wheel has fallen off and is now missing!
I have ended up with a model that I really wanted except that there are some issues which mean that it really isn't possible to show it to anyone. For instance, I came in today meaning to put it on my mirror turntable and take a video of it turning. However, with the  wheel missing, it looks ridiculous. It is such a shame. I expect that I will throw it away and have another go sometime now that I know the pitfalls. Lucky that it isn't an expensive kit.

The image below was taken at the club meeting so both front undercarriage wheels are in place.


Sunday, June 20, 2021

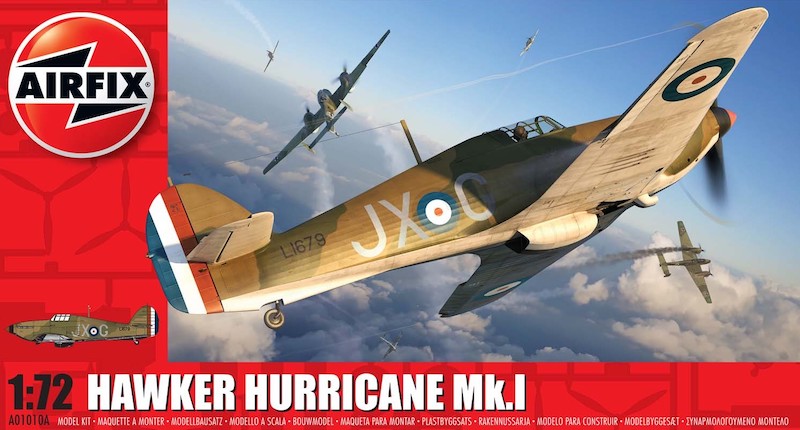
Simple little 1/72nd scale Airfix Hurricane

 I have been watching some programs about the construction of a two seat Hurricane. This inspired me to make a Mk. 1, which I had not done since I was a kid. I have made a 1/48th scale Sea Hurricane but I broke all the landing gear so it is a bit of a failure.

Anyway, I placed an order with our friends in the North (or Lowestoft at least) and got on with it.

The aircraft on the decals  was a 1939 Mk. 1 that was based in France during the "Phoney War". It had that strange black and white undersurface pattern. Colin Ovens describes the early war options in his book - "A (very) Rough Guide to UK Fighter & Bomber Colours September 1939 to the 1990s" which is available from the IPMS Clacton web site.

RAF fighters: UK & NW Europe

Sept 1939 to June 1940

Dark Earth/Dark Green disruptive camouflage was on the upper surfaces. Undersides were originally port-side Black and starboard-side White, divided along the centre-line of the fuselage - but on June 6, 1940 all fighter undersides were ordered to be painted in Sky. Little of this paint was immediately available to front-line squadrons, and thus aircraft undersurfaces appeared in a variety of locally mixed colours ranging from Eau-de-nil to Duck Egg Blue, but from early/mid-August 1940, the supply of Sky had much improved; by the end of September most fighters had Sky undersides. Squadron code letters were Medium Sea Grey; spinners were painted Black.

OK, so I had the details and proceeded with the kit. This is a very simple kit with not much of a cockpit (not that you could see in there anyway). I, fairly quickly, got the cockpit done, the fuselage made and the wings on. Nowadays, I leave the tailplanes off if I have to mask up a different colour on the underside from the upper surfaces. This makes the masking easier as you don't have to fiddle around them with the masking tape.


I had to use a good bit of filler on the wing roots as I could't get them to close up properly.

Once this was sorted, it was out with the trusty £15.99 Amazon airbrush and on with the paint. The black, white and brown went on fine. I tried masking up the green. I even scanned in the box and tried to size up the image so that I could cut out a mask. In spite of have a desk top publishing company some years ago, I failed miserably. Here is the scan.


After the first coat of green there was a need for a second coat. Now there are two different Tamiya codes for the RAF green and I have both bottles. I also have a Vallejo version. I forgot what I used on the first coat so had great fun sorting out the final colours!

Having finished the painting, I attached the undercarriage and doors. I found that I had lost the original tailwheel and aerial so I had to use the other ones on the sprue - presumably for another version of the plane but, hey ho, what do I know - grin. Lastly, I fitted some of the old Aeroclub stretchy thread, that I have had for years, as the aerial wire and all was done.

I knew that this was an easy little kit but I didn't find it much fun. Frankly, it was a bit of a fiddle.  Now I expect this on short run kits (see my next project) but I had hoped for better from a recent Airfix kit. Anyway. This is what it finally looked like.


Next up is a 1/72nd scale injection moulded replacement for the CzechMaster Resin Fairey Gannet AEW3 that I build some 10 years ago.  Unfortunately, I don't have the decals for my friends plane on HMS Eagle. This is a Sword kit and it is going together nicely - fingers crossed.